
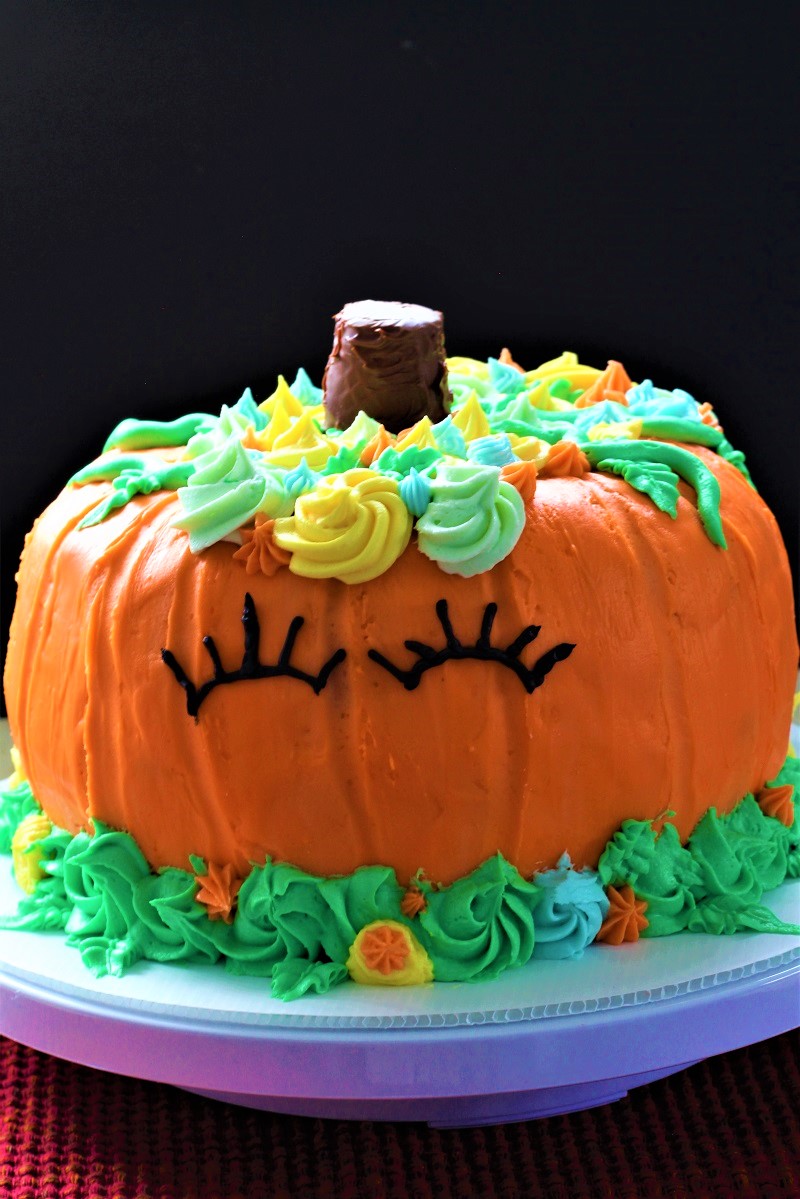
Fall garden pumpkin cake is a moist pumpkin cake that will be the center of attention. When the summer days start to disappear and the nights come too soon, sometimes you just need a pick me up. This is the cake that you are looking for to give you that pick me up!
When my daughter made her daughter a cute unicorn cake for her birthday, I thought that I just might want to make a fall garden pumpkin cake. And if I do say so myself, I think that it turned out pretty cute. It was worth the time that it took to make.
I did bake the cakes the day before and then I frosted them the next day. After the cakes had cooled, I placed them in plastic wrap and put them in the freezer. Then the next day, I took them out and frosted them.
The only time I had any trouble was when my hand made the frosting in the bag warn and it wouldn’t stick to the cake. Then I put it in the freezer for a few minutes and forgot to get it out, so then I had to let it warm up for a few more minutes, but I eventually got it done.

What Ingredients Do I Need For Fall Garden Pumpkin Cake?
Here’s a list of ingredients you’ll need to make this cake (scroll down for the full recipe):
- Bisquick mix
- Sugar
- Brown sugar
- Butter
- Pumpkin pie spice
- Milk
- Eggs
- Canned pumpkin
How Do I Make Fall Garden Pumpkin Cake?
Here’s the simple steps you’ll follow to make this cake (scroll down for the full recipe):
Cake:
- Grease and flour a 12″ fluted cake pan.
- In a large mixing bowl, beat the Bisquick, sugars, butter, pumpkin pie spice, milk, eggs, and pumpkin, on low speed for 30 seconds.
- Then beat on medium speed for 3 minutes.
- Spread evenly in the pan.
- Bake at 350 degrees for 50 minutes or until a cake tester or wooden pick comes out clean.
- Cool in the pan for 10 minutes, then turn out onto a cooling rack.
- Cool cake completely.
Instructions For Decorating:
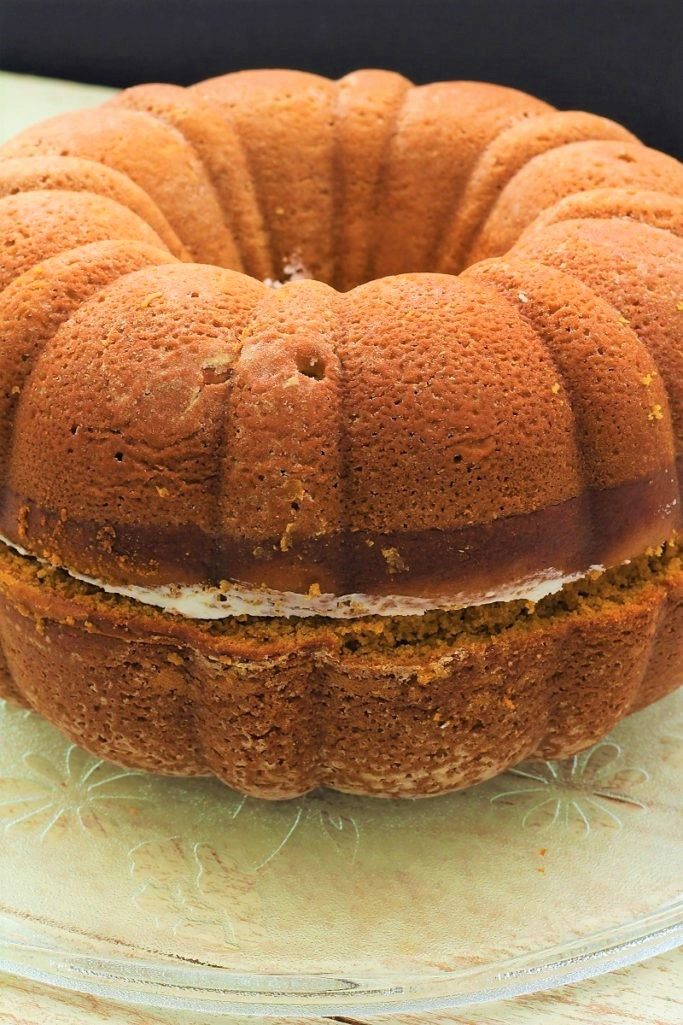
- Make two cakes, and trim the flat part of the cake so that when placing the two cakes together, they sit nice and flat.
- Place into the freezer and freeze for a couple of hours.
- Take the cakes out and frost one of the cakes on the part that you cut , then place the other cake flat sides together. It should look like a pumpkin.
- Frost the entire cake with orange frosting. I also put a piece of cardboard or a plastic lid in the top where there is a hole. Frost this as well.
- I placed the frosted cake in the fridge, and when I took it out I smoothed it by wetting my hands.
- Then I put a second coat of orange frosting on the cake, then I took the corner of a flat scraper and made lines in the cake. Then I returned it to the fridge for 15 minutes, took it out and smoothed it again.
- I used the bottom of an ice cream cone for the stem and I covered it with Nutella.
- Then I put two eyes on the cake.
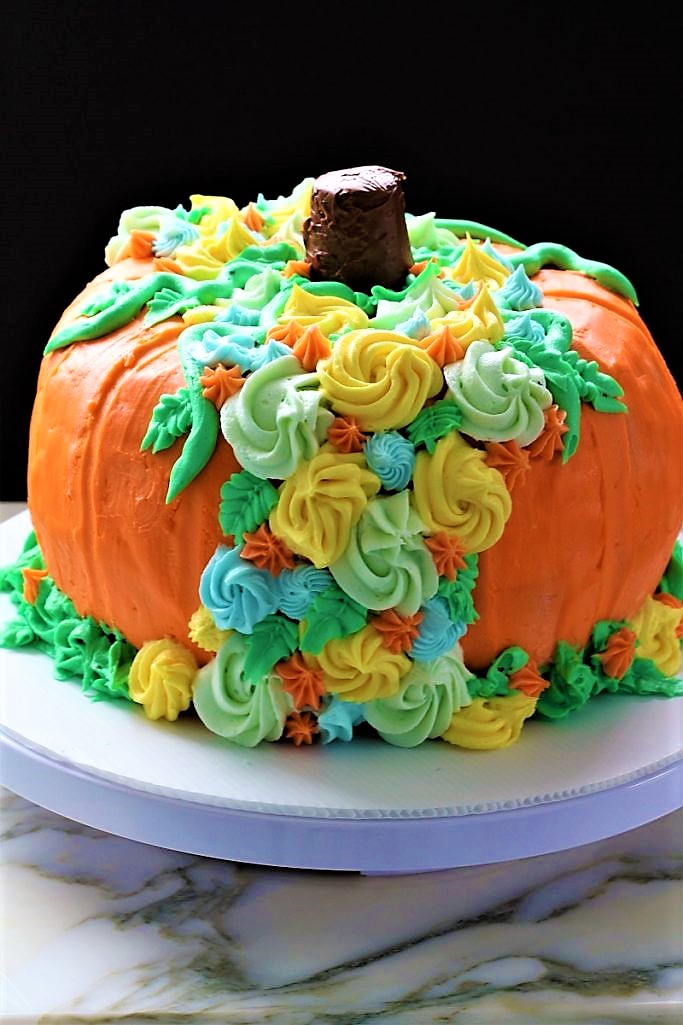
- Then take and make flowers and leaves with frosting of your choice.
- I did, light green, dark green, yellow, light blue, and some orange flowers.
- The leaves are all green, and I also made some squiggly vines.
I do like frosting, but I think that this fall garden pumpkin cake might be just a little too much frosting for even me! I think that I am going to have to have a party and serve cake, or I might just have to take some to the neighbors. And if they like frosting then they will really love me!
Should I Freeze my Cake Before Frosting?
- Freeze your cakes before decorating because it makes them easier to frost.
- There are a few crumbs, but when you freeze the cake, it makes a lot less crumbs.
- It makes it easier to frost the whole cake, as the frosting sets up because the cake is cold.
Don’t you just love this time of year when all the cute little kids dress up? My little granddaughters were dressed up today. Their mom had them looking so cute. One of them was Minnie Mouse and the other was Merida from the movie “Brave”. It fit her well because they are both spunky little red heads.
One of the local business’ was having a trunk or treat and so the kids dressed up and went. They looked so adorable. My grandson isn’t big on dressing up and so his idea of dressing up is putting on a football jersey.
He did say to me, grandma can I have some cake, and I told him that I needed to take pictures first. He assured me that it would be all gone and he wouldn’t get any and I told him that I was pretty sure that I would not be eating it by myself. There will be a piece of fall garden pumpkin cake when he comes next time.
Tips and Tricks For Fall Pumpkin Cake:
- Make sure your ingredients are fresh like your baking soda, baking powder, or even Bisquick. I used an older box of Bisquick for my first cake and a new box for my second cake and the second cake was fluffier and a little bit bigger.
- I used a butter cream frosting for decorating, but you could use a cream cheese frosting if you do not want to decorate your cake.
- Trim your cake before you frost it, otherwise when it is frozen, it is hard to trim it up to make it nice and flat.
- I put my cake in the fridge after putting each color of frosting on the cake so that it had time to set up. Example after doing the yellow flowers, put it in the fridge for about 4 minutes.
- You could also use a green ice cream cone for the stem.
Happy Fall!!
More Fun Cakes For You:
Surprise Strawberry Yogurt Cake
Fall Garden Pumpkin Cake
Fall garden pumpkin cake is a moist, dense cake. Perfect for the fall when you just need a pick me up. This cute cake will be the center of attention.
Ingredients
- 3 cups Original Bisquick mix
- 1 cup granulated sugar
- 1 cup packed brown sugar
- 1/4 cup butter, softened
- 2 teaspoons pumpkin pie spice
- 1/4 cup milk
- 4 eggs
- 1 (16 ounce) can pumpkin (not pumpkin pie mix)
Instructions
- Heat the oven to 350 degrees.
- Grease and flour a 12" fluted cake pan.
- In a large mixing bowl, beat the Bisquick, sugars, butter, pumpkin pie spice, milk, eggs, and pumpkin, on low speed for 30 seconds.
- Then beat on medium speed for 3 minutes.
- Spread evenly in the pan.
- Bake for 50 minutes or until a cake tester or wooden pick comes out clean.
- Cool in the pan for 10 minutes, then turn out onto a cooling rack.
- Cool cake completely.
Instructions for decorating:
- Make two cakes, and trim the flat part of the cake so that when placing the two cakes together, they sit nice and flat.
- Place into the freezer and freeze for a couple of hours.
- Take the cakes out and frost one of the cakes on the part that you cut , then place the other cake flat sides together. It should look like a pumpkin.
- Frost the entire cake with orange frosting. I also put a piece of cardboard or a plastic lid in the top where there is a hole. Frost this as well.
- I placed the frosted cake in the fridge, and when I took it out I smoothed it by wetting my hands.
- Then I put a second coat of orange frosting on the cake, then I took the corner of a flat scraper and made lines in the cake. Then I returned it to the fridge for 15 minutes, took it out and smoothed it again.
- I used the bottom of an ice cream cone for the stem and I covered it with Nutella.
- Then I put two eyes on the cake.
- Then take and make flowers and leaves with frosting of your choice.
- I did, light green, dark green, yellow, light blue, and some orange flowers.
- The leaves are all green, and I also made some squiggly vines.
Nutrition Information
Yield
20Serving Size
1Amount Per Serving Calories 190Total Fat 6gSaturated Fat 3gTrans Fat 0gUnsaturated Fat 3gCholesterol 44mgSodium 268mgCarbohydrates 31gFiber 1gSugar 21gProtein 3g
This data was provided and calculated by Nutritionix
Amy!! This is so amazingly cute! You are so talented!! I wouldn’t even want to cut into this 😉 Pinned!!
Thank you. I have always loved decorating cakes, even when I was in high school. This was so fun to make, although I will have to admit that it was pretty labor intensive. But it was worth it. Happy Halloween!!!
This cake is sooooo cute! You did such a terrific job decorating it!
Thank you so much. It really was fun to decorate, although it did take me a while, but it was worth it.
My goodness Amy, this is such an adorable cake. I have never bake a cake with pumpkin in it. With all that I see nowadays with pumpkin be it in a cake, muffins, or cheesecake- they all look so good. But this cake of yours is so amazing.. it will take me forever to just appreciate it before I could eat a slice. Too beautiful to slice and I bet its yummy!
Thank you so much. We love pumpkin and I just had a huge desire to make and decorate this cake. It did take me a while, but it was fun. I had a hard time cutting it too.
What a gorgeous cake! The cake itself turned out perfect..
Thank you so much. I really did enjoy making and decorating this cake. It was so fun to make in spite of the fact that it took me a while, but it was so worth it.
Love the idea! A pumpkin spin on the unicorn cake design. Very creative!
Thank you Catherine! I hope that you have a wonderful Halloween and Fall!Thank you for stopping by.xoxo
Wow this is so amazing and beautifully decorated!
Thank you Kat! Happy Fall. 🙂
What a super cute cake! Now I need an excuse to make one too!
And Carlee, I know when you do it will be amazing! xoxo
How cute to serve at a Halloween party or even Thanksgiving! Pinned 🙂
This cake was really fun to make. It did take a while, but it was so worth it. Thank you for coming by and leaving a comment.
Amy,
OMG this cake is so precious. Love it. You did a fabulous job.
Congratulations, you are being featured at over The Moon Linky party tonight. I hope you stop by. https://www.eclecticredbarn.com/2019/10/over-moon-linky-party_20.html
Hugs,
Bev
Thank you for featuring our Fall Garden Pumpkin Cake. It was a very fun cake to make. Even though it took a while to make it, I was so happy with how it turned out. Thank you for coming by and leaving such a nice comment.
Thank you for sharing at #OverTheMoon. Pinned and shared. Have a lovely week. I hope to see you at next week’s party too!
Amy it’s just beautiful! I love it! Thanks for the recipe and detailed instructions I’ve pinned for future reference.
Thank you. This cake is a bit of work to make, but it is really fun to make and I love how it turns out.
SO CUTE AND LOOKS SO YUMMY!
Thank you for coming by and leaving a comment. This cake is a bit of work, but it is so fun to make and really does turn out so cute.